Roof ventilation is really important, and it’s not something that you should disregard. But as you may be aware, there are several types of roof vents that you can install, and your choice will largely depend upon the composition of your roof and the job you want the vents to perform.
To help you settle on the perfect vents for your home, we introduce you to eight different types and provide you with an overview of their installation costs. (Related: Drop The Temp: Here's How Much Attic Fan Installation Costs) But let’s begin by looking at why vents are such an important addition to your roof.
Why Do I Need a Roof Vent?
The primary job of a roof vent is to ensure proper airflow at the top of your home, which reduces the moisture level that can build up in your attic. Without the correct ventilation, mold and mildew will grow in the attic and potentially damage the structural integrity of the roof.
There are two main types of roof vent – intake and exhaust – both of which contribute to the correct ventilation of your home. In the section that follows, we introduce eight types of roof vents and explain why they should be installed.
Eight Types of Roof Vents and Why You Should Install Them
1. Soffit Vents (Intake)
Why Install: To ensure sufficient airflow into your attic.
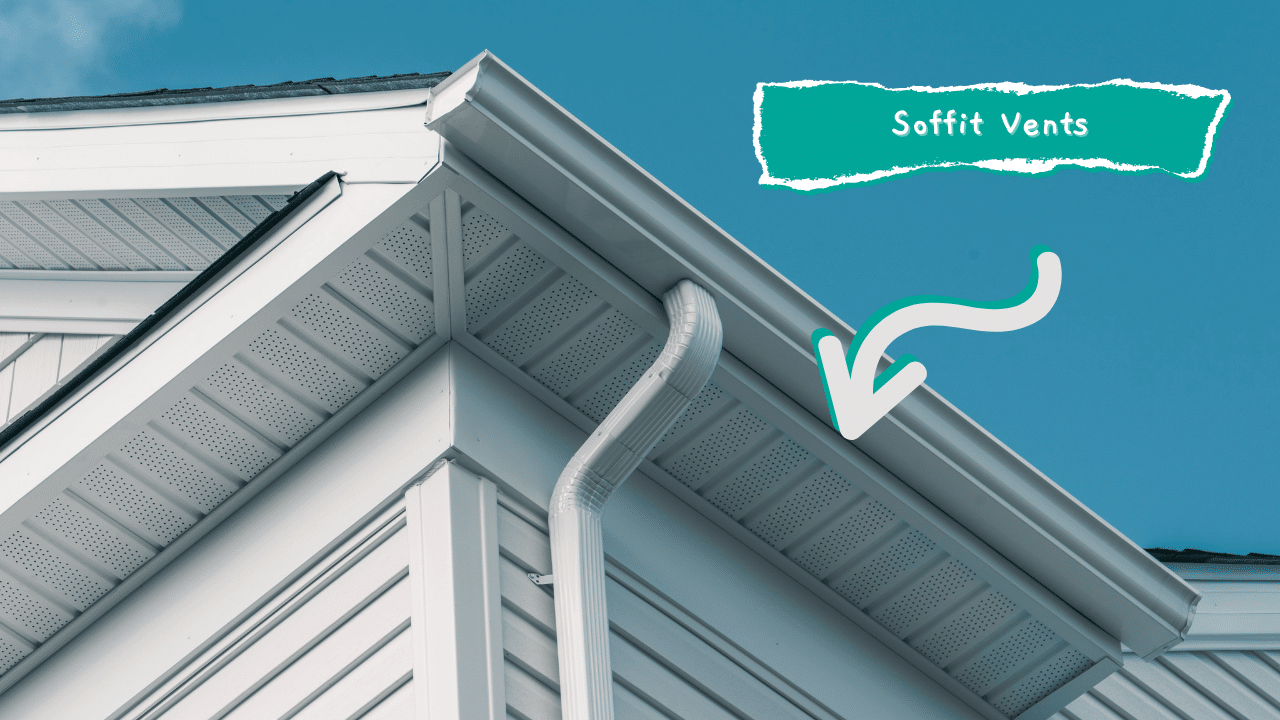
Positioned under the eaves, soffit vents ensure fresh air can enter the attic space underneath the roof. Due to their subtle design, soffit vents don’t detract from the aesthetics of your property and are a popular feature on old homes as well as new builds.
2. Drip Edge (Intake)
Why Install: To ensure sufficient airflow into your attic if you don’t have an overhanging roof.
To install a soffit vent, your roof must have a degree of overhang, which isn’t a feature of every home. Therefore, a drip edge vent serves as a decent alternative to Soffits, as they serve the same purpose. Drip edge vents are installed immediately underneath the shingles and create a small gap that allows air to enter the attic.
3. Over Fascia (Intake)
Why Install: To ensure sufficient airflow into your attic, if you want a vent that can’t be seen from the outside.
Although over fascia vents are similar to drip edge vents, the main difference is that they sit just above the fascia board that runs the length of your home, as the name would suggest. An added benefit of over fascia vents is that they’re invisible from the outside, as the roofing shingles cover the vent. They’re ideal for homeowners looking for an air vent that can’t be seen from the outside.
4. Ridge Vents (Exhaust)
Why Install: To allow hot air to escape through the attic
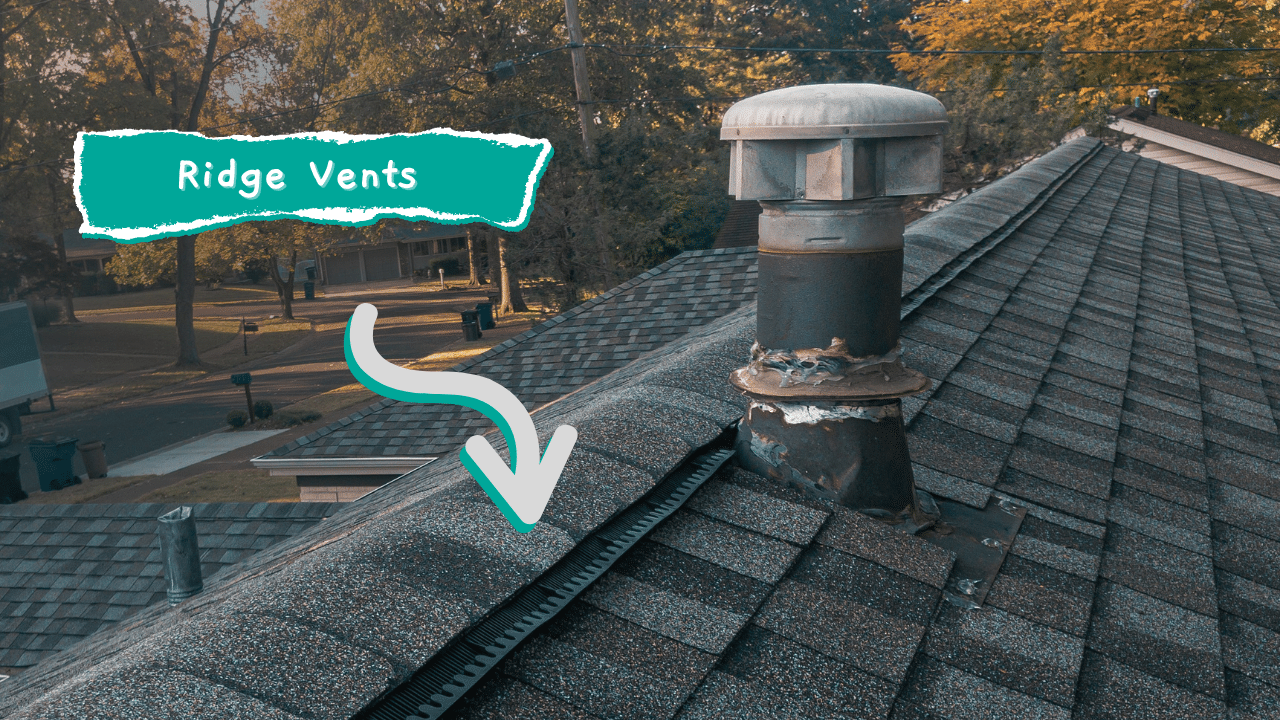
Ridge vents are installed at the top of the roofline and provide sufficient space for hot air to escape from your home while preventing rainwater from entering. Most homeowners cover the vent with a layer of shingles, so the aluminum cap doesn’t detract from the aesthetics of the roof.
5. Wind turbines/Whirlybirds (Exhaust)
Why Install: To allow hot air to escape through the attic when there is sufficient wind
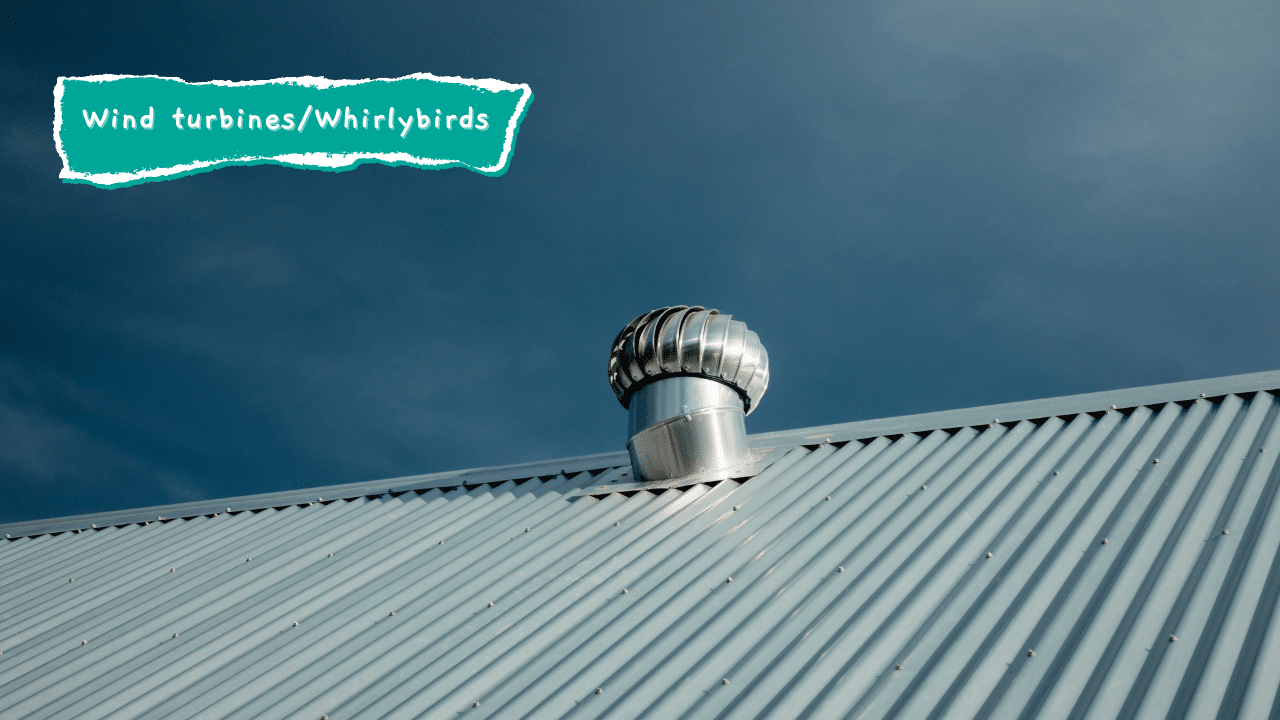
If ridge vents are inconspicuous on the roof, whirlybirds are very much conspicuous! They sit atop the roof and catch the wind, which is pulled in by an internal turbine. This then enables the device to pull hot air out of the attic. A wind turbine vent isn’t ideal for every home, as they require wind to operate – usually at least 5mph.
6. Box Vents (Exhaust)
Why Install: To allow hot air to escape and to work in conjunction with soffit vents
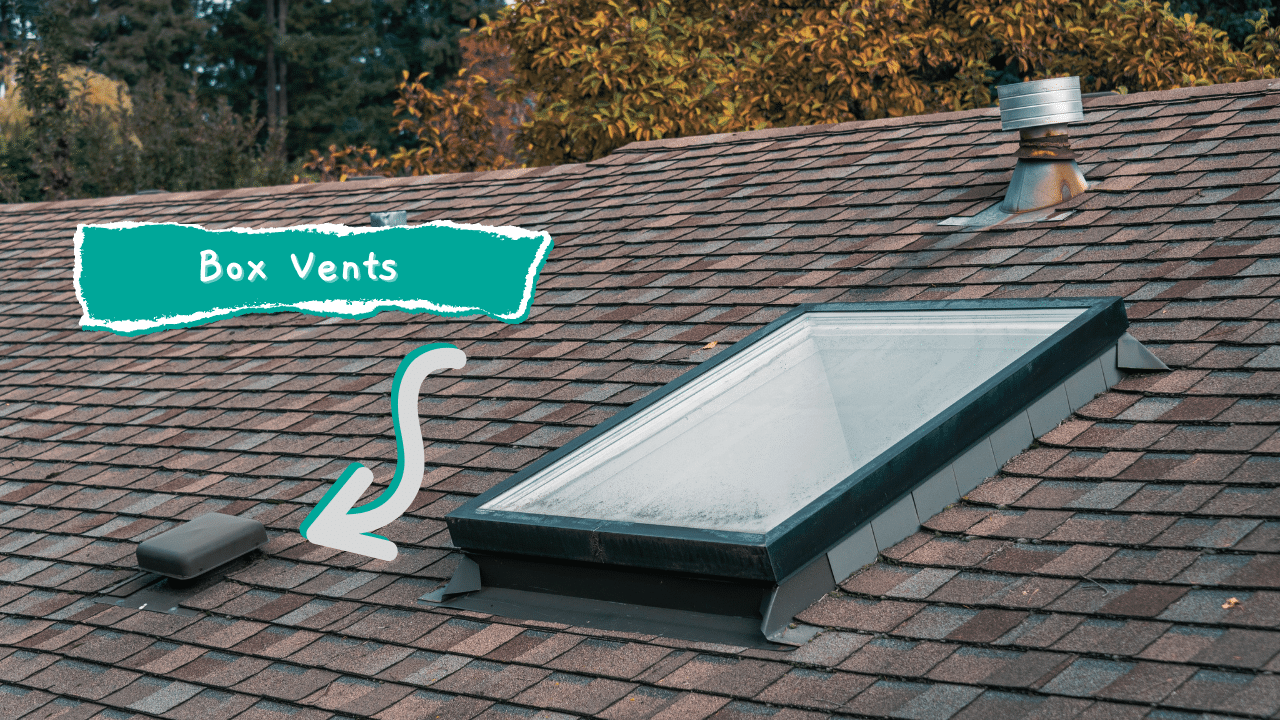
Box vents are typically paired with soffit vents as the two work hand in hand. Just like ridge vents, box vents don’t require power and work on their own. The only potential drawback is that you typically require several box vents to sufficiently release enough hot air from the attic.
7. Power Vents (Exhaust)
Why Install: To allow hot air to escape through the attic without relying on wind
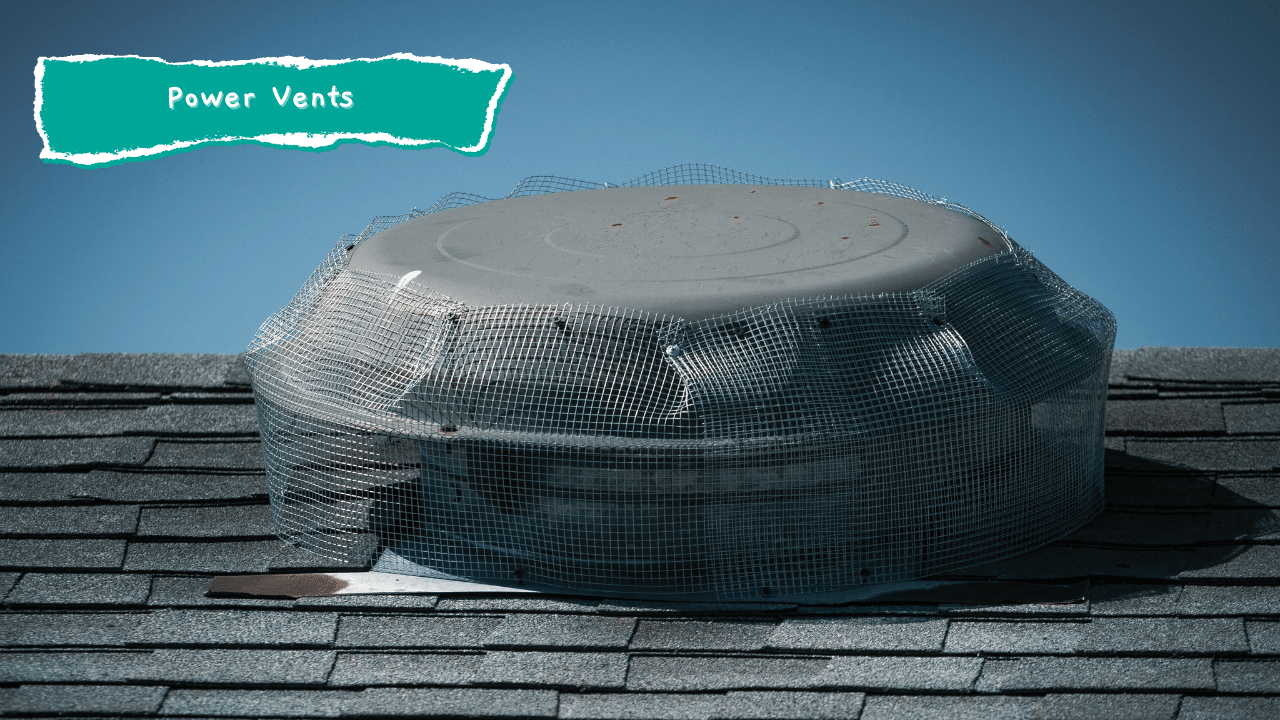
Power vents are essentially an upgrade on whirlybirds, as they don’t require wind to operate, and they’re less obvious when positioned on the roof. Within a bowl, an electric fan is triggered by a thermostat that kicks in once the air reaches a certain temperature. It then blows the hot air out of the roof. There are also solar-powered vents that are eco-friendly.
8. Gable Vents (Exhaust)
Why Install: To allow hot air to escape from attics with large gables
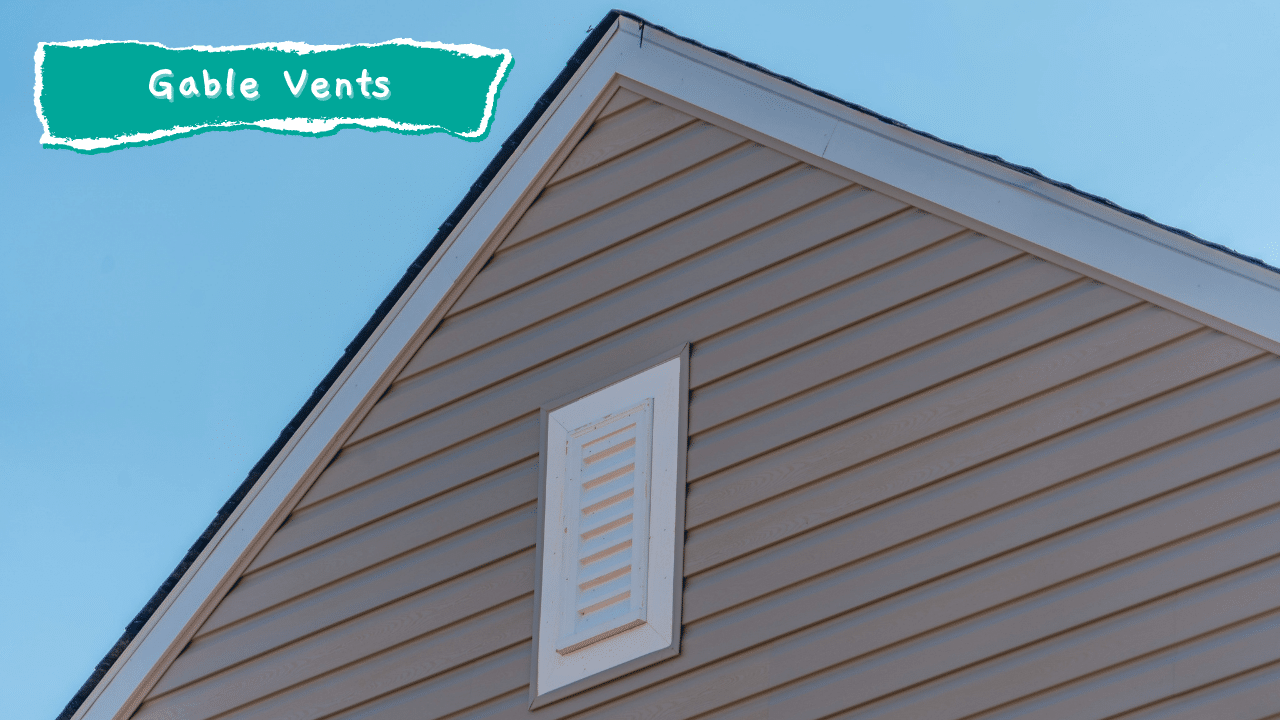
As the name suggests, gable vents are ideal for properties with extensive gables. They are typically built into the gables on the walls of your attic, which means you don’t have to cut holes in the roof to ventilate the area. They’re perfectly suited to larger attic spaces and are cheap to install.
To remove hot air and enable sufficient fresh air to enter your home, you need to install both intake and exhaust vents. We introduce the typical costs associated with roof vent installation below.
How Much Do Roof Vents Typically Cost?
According to Home Advisor, it typically costs between $300 and $650 to install roof vents at your home. To get an idea of what costs to expect for the different vents introduced above, you can use the table below as a guide:
Type of Vent | Installation Cost |
|---|---|
Intake: Soffit, Drip Edge, Over Fascia | $315 - $465 |
Exhaust: Ridge | $400 - $500 |
Exhaust: Wind Turbines | $65 - $250 |
Exhaust: Box Vents | $145 - $550 |
Exhaust: Powered | $235 - $700 |
Exhaust: Gable | $80 - $290 |
The above prices include the cost of materials and labor. The main determinant of the price of installation is the size of your roof, so you will need to consult an installation form in your area to get an accurate quote for your property.
Final Thoughts
Roofing vents are a crucial installation at your property. They enable hot air to escape from your home and provide an inlet for fresh air to flow through, which reduces the risk of mold and mildew growing in your attic or crawl space. Correctly ventilating your home is important, so make sure you install the required intake and exhaust vents for your particular roof.
