Homeowners who have previously dealt with a sink drain issue or plumbing-related problems know what a P-trap is.
But if you're still wondering, "What is a P-trap?" Don't worry– you're not alone. Only a few homeowners in the country know how it works and its importance.
What is a P-Trap?
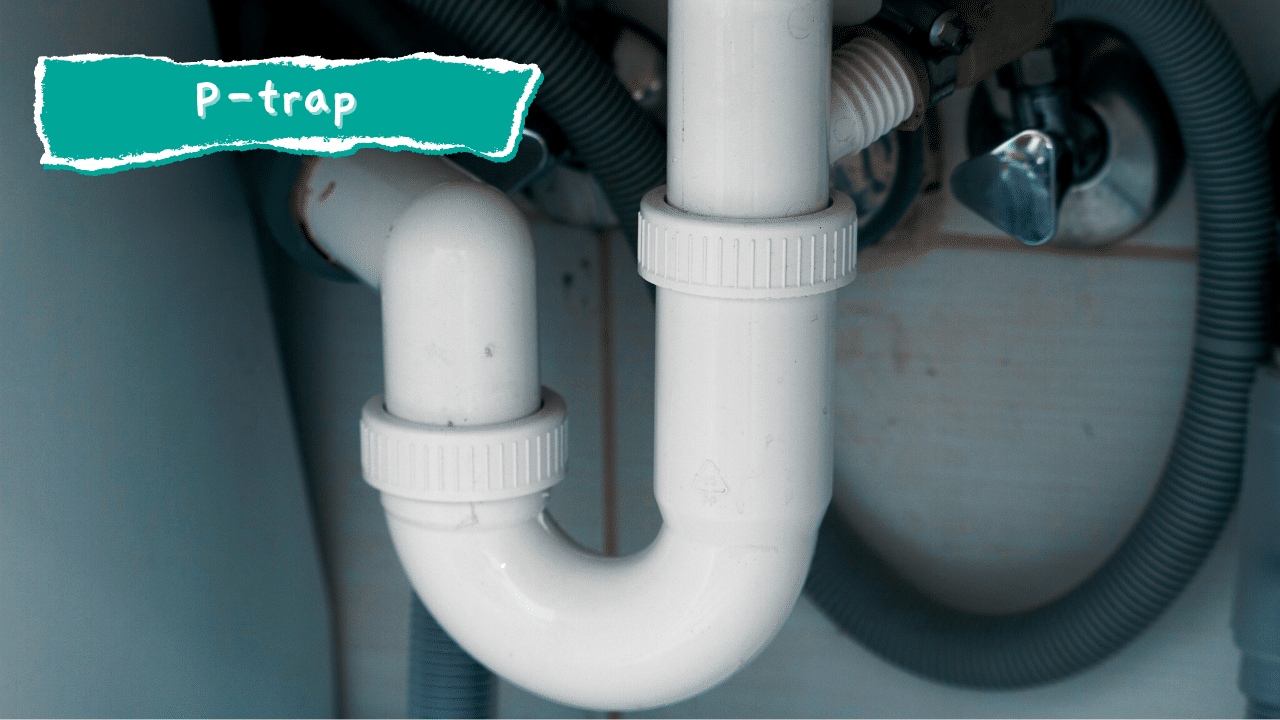
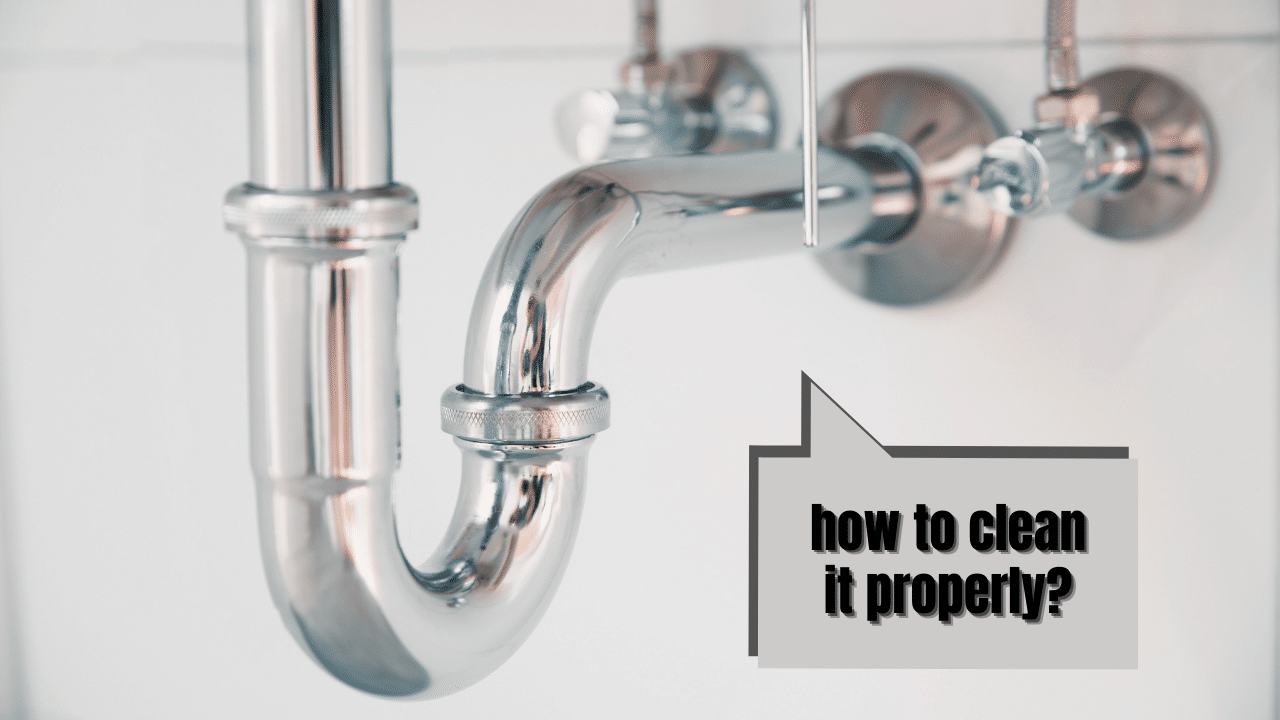
Simply put, a P-trap is a piece of plumbing equipment waste pipe that takes on a u-shape bend. It connects your drain to a septic tank or the sewer line itself.

These are commonly found below the sink, shower, or bathtub drain and are typically made of metal or PVC material.
What problems will you have to deal with if you lack a P-trap at home? For starters, foul and potentially toxic sewer gas may fill your residence.
P-traps retain clean water in your drain line. These act as a liquid barrier or water seal to prevent the entry of harmful sewer gas from the plumbing line into your home.
Consider a P-trap to be a necessary part of a residential plumbing system. If it is improperly installed or serviced, you are likely to deal with sink problems in the long run (along with other related issues). (Related: Plumbing Terms Every Homeowner Should Know When Remodeling Their Bathroom)
Is a P-Trap Necessary to your Home Plumbing System?
What makes a P-trap an essential part of your plumbing system? Let's discuss the reasons in detail.
First, local plumbing codes commonly require a P-trap installation near open drain lines. Anywhere wastewater is expelled right into a drain waste vent. Next, a P-trap effectively traps any solids which may cause clogging problems to your drain or sewer line.
And as mentioned above, it hinders the sewer gases from coming up into your household via the drain line. Keep in mind that sewer gas (such as methane) has a very foul odor. Inhaling massive amounts, unknowingly, may only put your health at risk.
Another advantage to P-traps is that they help catch small objects, such as accessories or jewelry– giving you a chance to save them from flowing directly into the sewer line. So, if you lost a ring while washing dishes, you might disassemble the P-trap conveniently to retrieve it safely.
To cut the story short, P-trap installation is required in any modern plumbing design. Most building codes also need you to add a P-trap in the plumbing line for bathroom and kitchen sinks, as well as bathtubs and showers.
Where Does the Name "P-Trap" Come From?
If you're curious about where the "P-trap" name came from, we understand. Many homeowners continue to wonder how the name came to be.
The name refers to its letter P shape resemblance as it connects the sink drainpipe with a horizontal overflow pipe. The "trap" refers to how the equipment serves as a water "trap." The P-shaped bend is responsible for holding the water and forming a vapor barrier between your home's interior and the sewer line.
There's no need to worry about the standing water in your plumbing line. If anything, the water contained inside a P-trap is clean tap or toilet tank water.
How come? Well, the faucet or showerhead force is enough to flush any wastewater down into the sewer line. What remains in the P-trap is clean water– unless you're dealing with a clog, that is.
Step by Step Process: How to Clean a P-Trap
Now, let’s talk about P-trap cleaning. This equipment may be prone to heavy debris build-up over time, so it’s a good idea to have it cleaned often.

What you’ll need:
- 1A small bucket to catch all water or falling debris
- 2Wire brush (Flexible kind) to quickly get to the bottom of the P-trap
- 3Pliers or Wrench
Step 1: Ensure the Faucet is Turned off
To make the P-trap cleaning session as easy as possible, you will need to shut off the sink faucet you’re working on.
Easy doesn't mean neat, though, unfortunately. It's still common for the P-trap cleaning process to get messy (think of the water and other debris). It's best to put your small bucket just right under the trap before attempting to remove it in place.
Step 2: Slowly Remove the P-trap
If you want to give your home's P-trap a thorough cleaning, you must remove it. It may sound complicated but don't worry– all you need is a pair of strong hands and a washcloth.
Hold the connecting pipe while unscrewing the P-trap slowly. Loosen the lock nuts out of the way and pull down the trap section connected to the tailpiece. Once done, repeat the process to the other side.
Ideally, you now have removed the P-trap. Traps that are stuck or haven't been removed after a long time may need more strength on your end– especially when working with tight nuts.
You can bring out your pliers or wrench to make the process go smoother. Once the nuts are loosened, water may begin spilling out of the pipe. The amount of water will primarily depend on your P-trap's capacity.
Don't forget to dump all the contents (water and debris alike) straight into the bucket!
Step 3: Give the P-Trap a Thorough Cleaning
You'll be surprised at how easy it can be to clean the trap. Start by pulling any dump or debris out of the P-trap and straight into the bin/bucket.
With a flexible wire brush, make sure it is wet enough before pushing the brush inside the pipe. It helps you remove any foreign object that's trapped inside.
Repeat the brushing process until you notice no more visible residue in the brush itself.
Step 4: Assemble the P-Trap Back Together
After ensuring your P-trap is now clean and neat, you will need to put it back together again. Line up the pipe pieces in their correct order before screwing the nuts in place. Pro tip: the pipe's long end usually faces the front, with the short end at the back.
There is no need to exert too much effort in pushing the nuts. Just make use of your pliers or wrench to make it a whole lot easier for you.
Afterward, you may need to test the pipe to ensure no problems, such as seals or PVC welds leaking.
To do this, have the water running for around 15 seconds and observe the P-trap in the process. If there are no leaks, take it as a good sign you're good to go and ready to tidy the place up.
If you notice any water (even droplets) from the nuts, chances are you may need to tighten the bolts or use Teflon tape to reinforce the seal.
Telling Signs of Possible P-Trap Trouble
If you want to avoid being in a costly situation, keep an eye on your P-trap once it shows early signs of trouble. It usually manifests in slow draining showers or sinks.
Once you notice your sink/bathtub having backup problems, you better take it as a sign of P-trap trouble.
Here's a list of trouble signs to keep in mind:
Another common P-trap issue is clogging. Your trap is prone to clogs since it collects heavy items and debris in the bottom. Not to mention, any large items such as jewelry may also enter the drain and be lodged in the P-trap.
Water may leak from the bent pipe joints of the P-trap, the area where the straight pipes are usually connected. You may want to monitor this area thoroughly, as it is often an early symptom of clogging.
If properly undrained water finds another exit, this may also result in leaking. Suppose your P-trap remains unused for a while. In that case, any water inside may eventually evaporate. You will then lack a sufficient water seal– which may allow sewer gas to flow.
How Can I Unclog a P-Trap?
Fortunately, you can try more than one method to unclog a P-trap at home. Several homeowners turn to a drain clog dissolver for minor clogs, which resolves the issue in a few minutes. These drain cleaners effectively get rid of grease or any foreign mineral build-up on the pipe walls. In return, this increases your P-trap's water flow.
Here's a step-by-step process for your reference:
- 1Pour the dissolver into the sink or shower that's clogging.
- 2Use an auger or retractable drain snake to pull out the clog
- 3Optional: Have the P-trap removed for cleaning.
However, if you're dealing with an extreme clog, a dissolver may not suffice. You can use an auger (AKA a drain snake) to try and extract the clog.
These "snakes" can dislodge any obstructions in the pipes. Since they are flexible cables, opt for the good kind or the ones with handles so you can rotate the line and grind off any build-up in the way.
If that proves to be unsuccessful still, you may need to have your P-trap serviced accordingly. Homeowners may contact a local plumbing professional to disassemble the fixture and give it a more thorough cleaning.
How Often Must I Clean my P-Trap?
It would be best if you cleaned your P-trap once every three months as recommended by plumbers. Regular cleaning will help to keep your line water freely flowing.
Hope that this article helped you a lot in understanding the P-Trap and how to clean it. Thank you and have a great day!
