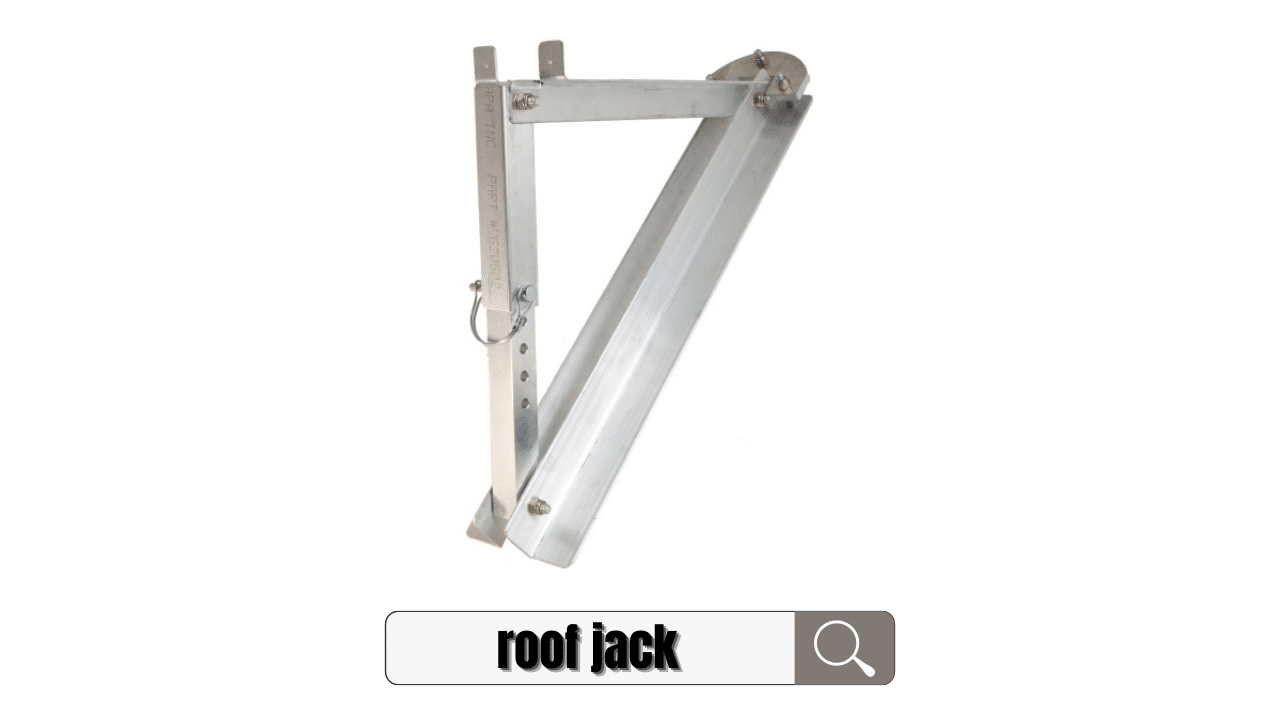
If you are in the roofing business, you will know what a roof jack is, as you probably own a few. If you are planning to do some roof work for the first time, as many men attempt at least once in their life, then a roof jack should be first on your hardware shopping list.
Roof jacks are adjustable steel brackets that fit a piece of wood, providing a safe and secure platform to work from while working on a roof. Roof jacks are secured to rafters under the roof shingles with 16D nails and fit a straight piece of wood (2x8-inch/2x10-inch), forming a scaffold for roofers.
Roofing is a dangerous business that requires many safety measures to keep the roofers safe. A roof jack is one way to ensure a safe work environment when working on steep angled roofs or roofs with many obstacles that need navigating like vent pipes, chimneys, etc. This article will cover what a roof jack is and how to use it properly.

What is a Roof Jack?
A roof jack is normally a J-shaped adjustable steel bracket that can be purchased from home centers, hardware stores, or lumber yards and is used as a sort of scaffold on the roof. It works like a typical painter's scaffolding setup, but instead of adding a platform next to a high wall that needs to be painted, it provides a platform for a roofer to work from and is attached to the roof. (Related: Roof Replacement Cost & Consumer Guide)
Roof jacks are an extremely crucial safety measure when working on a roof (all kinds of roofing projects). Most roof jacks will be adjustable to work with different roof pitches. It attaches to a roof’s rafter and fits a plank/board which roofers stand on. The number of jacks required will depend on the angle and height of the roof (roof pitch)-more on this later!
Steps on How to Set Up and Remove a Roof Jack
Setting up your roof jacks should be a walk in the park if you follow the following steps:
Step 1: Attach the Jacks to your Roof
Step 2: Attach the Plank to the Jacks
Step 3: Removing the Jacks
Why Does a Roof’s Pitch Dictate Whether or Not a Roof Jack Is Required?
Some roof designs/slopes will, in essence, not require a roofer to install roofing jacks to complete the job at hand. The roof's pitch will typically guide you if the roof jacks need to come out of the equipment shed.
What is a Roof’s Pitch?
Roof Pitch | Roof Angle in Degrees |
|---|---|
1/12 | 4.76 |
2/12 | 9.46 |
3/12 | 14.04 |
4/12 | 18.43 |
5/12 | 22.26 |
6/12 | 26.57 |
7/12 | 30.26 |
8/12 | 33.69 |
9/12 | 36.87 |
10/12 | 39.81 |
11/12 | 42.51 |
12/12 | 45.00 |
13/12 | 47.29 |
14/12 | 49.40 |
15/12 | 51.34 |
16/12 | 53.12 |
If you are not sure what your roof's pitch is, you can measure it yourself.
Roof Pitches That Require Roof Jacks
Before you start installing roof jack’s all over your roof, you need to consider if it is actually necessary and worth the effort:
It's all about your safety or the safety of the roofers from the roofing company, and using a roof jack is up to the person who is risking their life on the roof.

Are Roof Jacks the only Safety Measure that You Can Use When Working on the Roof?
Roof jacks provide a safe platform to work from while on the roof, the bare minimum of safety, and it is highly recommended that you add some extra safety features when up high on a roof. Adding some of the following items to your fall arrest system will further protect you from serious injuries:
Conclusion
Roof jacks are a vital component when working on a roof-especially a steep roof- and are normally the first thing a roofer attaches before starting working on a roof. A roof jack is pretty easy to install and remove. Following the steps listed above, it should guide you perfectly when attaching and removing the jacks, as well as not damaging your shingles.
Use extreme caution while working on a roof, as injuries can happen at any time. Adding some safety items to your personal fall arrest system will help prevent serious or even fatal injuries from happening.
